
The “Screen Captures to Slide” Automator workflows are used to create a new image slide containing a screen capture of a window or region.
These workflows, launched from the system-wide Script Menu, are great tools for creating documentation and presentations.
They work by capturing a window or area selection to the clipboard, saving the clipboard image to file, and then creating a new slide with the saved image in the frontmost Keynote presentation.
New Slide with Window Capture
The first example workflow captures a window to image and adds the image to a new slide. To create the workflow, launch Automator and select “Workflow” from the Automator Template Picker sheet.
1 Take Screenshot Action • Add this action to the workflow and set its parameters to be interactive, selecting a window as the target for capture, and saving the results to the system clipboard.

2 Save Clipboard Image to File action • This action will save the image data on the clipboard to an image file in PNG format. Selecting the options to save the image to the workflow’s temporary folder will ensure it will be erased after importing in the Keynote slide.
3 New Image Slide from File action • This action will create a new slide in the frontmost Keynote document with the image whose file is passed as input to the action. Select the placement option to “Scale to Center”.
New Slide with Selection (Region) Capture
The second example workflow captures a selection drag area to an image and adds the image to a new slide. To create the workflow, launch Automator and select “Workflow” from the Automator Template Picker sheet.
1 Take Screenshot Action • Add this action to the workflow and set its parameters to be interactive, choosing a selection drag area as the target for capture, and saving the results to the system clipboard.
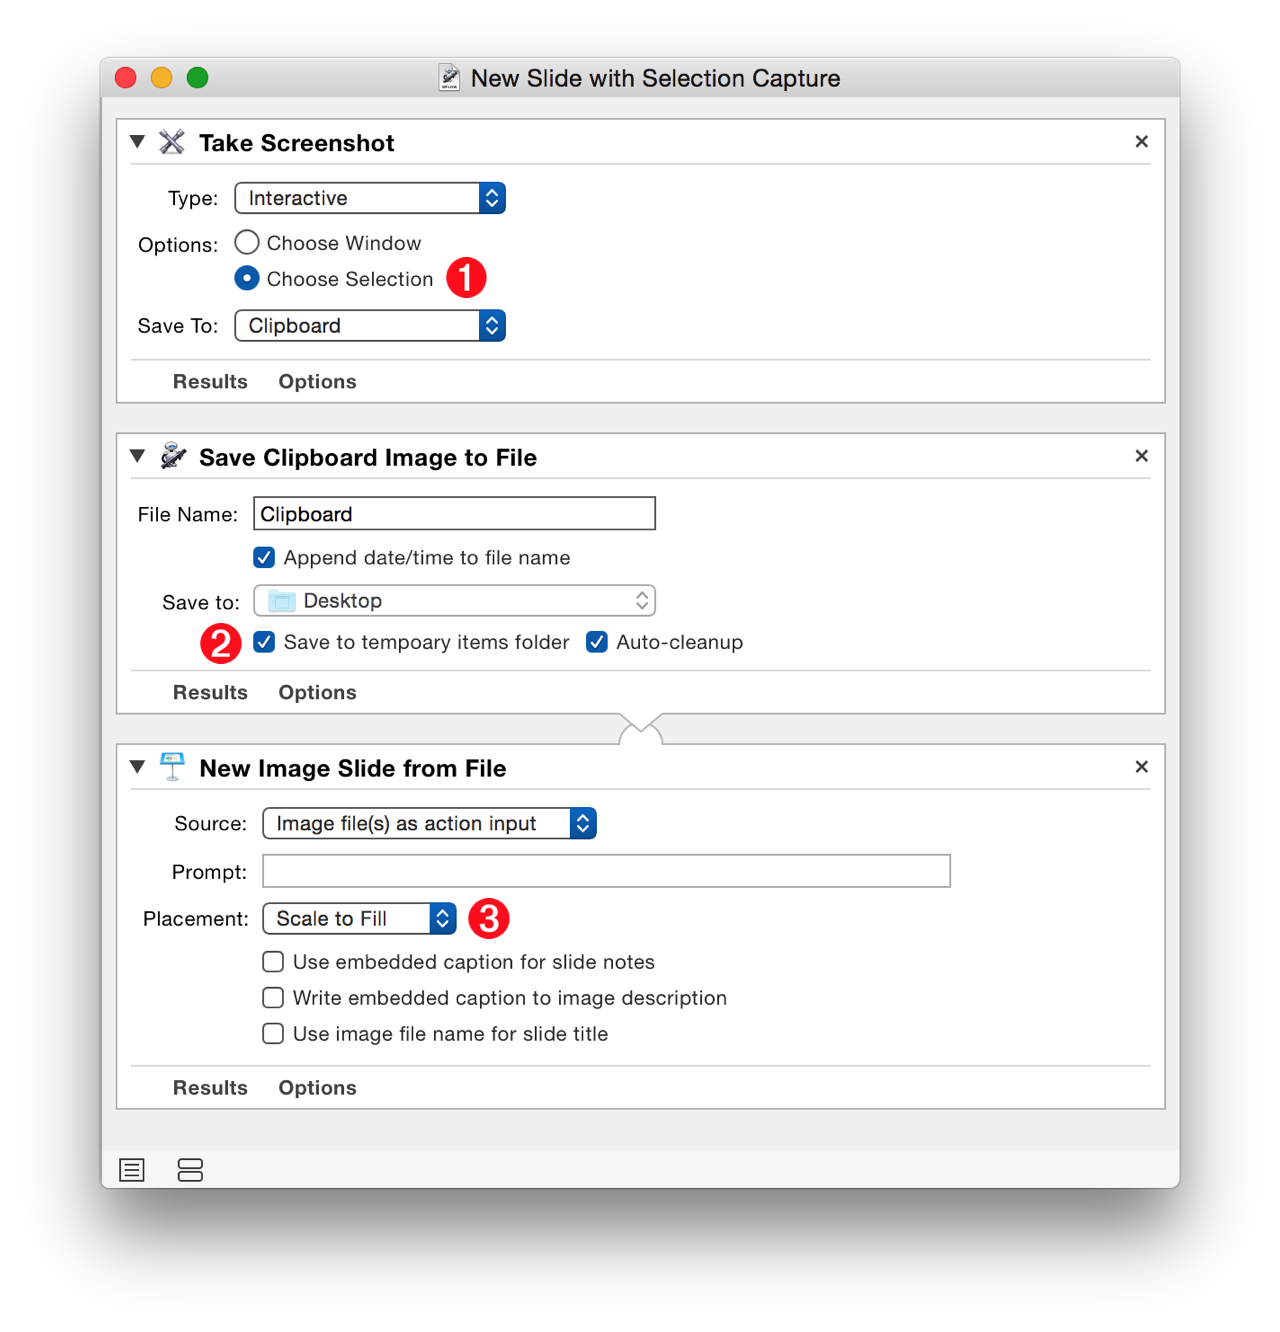
2 Save Clipboard Image to File action • This action will save the image data on the clipboard to an image file in PNG format. Selecting the options to save the image to the workflow’s temporary folder will ensure it will be erased after importing in the Keynote slide.
3 New Image Slide from File action • This action will create a new slide in the frontmost Keynote document with the image whose file is passed as input to the action. Select the placement option to “Scale to Center”.
DOWNLOAD an installer for the example workflows that will activate the Script Menu and install the workflow into the User Scripts folder. Once installed, the workflows can be executed from the Script Menu from within any application.
TIP: To open a workflow for editing, select it from the Script Menu while holding down the Option key. To reveal a workflow in the Finder, select it from the Script Menu while holding down the Shift key.